Wednesday, January 30, 2013

Bristles for Brushes...trial and error

As much fun as it can be at times, when it becomes more error than success it can become frustrating.

After a bit of experimenting I think I have settled on a brush method.

First you need some hair, of course it is always important to get ones materials from an ethically raised, sustainable source which in this case is.....moi.

So I have a habit of letting my hair get REALLY long, when I was ill it got to the point where I could almost sit on it and I would get comments from strangers. It was a pain to wash and brush.. Before I had my big surgery I had no idea what my recovery was going to be like, I was aiming to make life easy for myself by cutting the hair short so it would be easy to care for. I was preparing for the worst (a long and somewhat painful recovery) so that anything less awful than that would be a bonus.

This meant cutting about 15 inches off my hair which was cut whilst tied and displayed on my bookcase as a trophy. (This hair was not suitable for charitable uses as it was very thin and low quality due to my illness and all the strong meds I had been taking.) It looked like a dark blonde dis-articulated cats tail. You will be pleased to hear my recovery was a hundred times easier than I could have hoped for.

18 months (and 2 big surgeries later) I am looking for a bristle source and there it was sitting on my bookcase and from there I went. And I need to cut to my hair again.


I took a length from the end of the bundled hair, about an inch and a half long. Select a pinch of hairs to suite the size of brush you want to make.


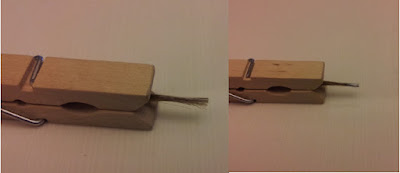
Twist together and hold them together with some form of clip, I have used a clothes peg.

Using a flexible white glue (like PVA, tacky glue, elmers) and dip the ends making sure that all the hair ends are covered, allow to dry


Note, at this point in writing this post I didn't feel very well. I spent two hours in the bathroom feeling progressively worse before calling for an ambulance and spending my early sunday morning hours receiving emergency IV fluids at the local hospital. Anyway, they sent my mostly re-hydrated ass home with instructions to drink like a fish whilst I shift this gastroenteritis. Most people don't need the hospital for the bug which is doing the rounds here at the moment, however I am short precisely one colon (see above major surgeries) and if I am ill, I can dehydrate extremely fast. At midnight I was fine and writing this post but by 2.11 am we called the emergency services.  A few bags of fluids and some anti-nausea meds and I felt more human and was sent home, hopefully to sleep it off.

Returning to the post 48 hours later, we continue.

To give the bristles some strength, I wrapped a thin strip of tissue paper around the glued end. (1) After experimenting I recommend that you not trim the brush head at this point.

Butt the brush end to the handle and attach with a strong glue (2). I used superglue gel but E6000 would probably be great, but it would take longer to dry and I don't have any yet :(

For the final ferrule, I wrapped another layer of tissue paper (which happened to be silver/grey), wider this time to cover the paper already there and the join with the handle (3), glue and allow to dry. Remove excess. Tissue paper wet with glue tears nicely and smooths with almost no visible seam.

 Trim bristles to the desired shape and size using real brushes to guide you. Seal with an acrylic varnish to protect the ferrule and handle.


And you are finished, now enjoy your handy work. Here we have a selection I made, some of the ferrules I coloured with metallic sharpies before sealing. The green handled brush on the right has a ferrule made of aluminium foil from the kitchen as an experiment but I think it is too shiny and prefer the others.
 
And as promised to Nina, here is the brush handle which was attacked with carving tools and became a wand, there is not much detail but it certainly implies more than just a plain stick.

And in the non 12th scale mini world, this might have fallen into my trolley in the toy section of the supermarket today. I treated myself after such a rough couple of days. (£2.99) Love cats, love lego, what more could I ask for.

What next? Those paint pans need a box to live in!

I am beginning to think about the pieces of furniture that any self respecting which would have in her home, and then I can select a size for the ground floor. Then construction of the mock-up can begin and all the design choices and challenges worked out before really 'breaking ground'

Until another day, Kim

Saturday, January 26, 2013

Paintbrush Handles and Dremel Identity Crisis

Before I talk about matchsticks and dremels which think they are lathes, I want to thank the people who have checked out my fledgling blog, followed and left comments. You have been hugely encouraging and for that I am most grateful.

Yesterday was my most visited day ever with 17 page views (taking me to 114) and more than doubled my followers (from 3 to 7) so welcome all, make yourselves at home and grab a cup of tea. I am going to try to get content up at a rate of about 2-3 posts per week.

One of my favourite things is finding new ways to use easily available and low cost supplies (often from the DIY store) and use them to make unique items or give mass produced items some character. I want somewhere to share my findings, also if I go without making something for a few days I wont have post fodder so it will kick my butt into gear.

Right now I have a good range of craft supply basics but lack many tools and specialist items, I will be obtaining these as I can. I have a long list of things I would like and tools I would like to try. I wanted to try using a drawplate to reduce the thickness of a cocktail stick to make paintbrush handles.

Lacking a draw plate, I decided to experiment.


I put a very cheap matchstick (2.4mm sq and 43mm long) from a kids craft pack into the dremel multi-tool


Then worked at it with coarse and then fine sandpaper. The first attempt I went too far and it snapped, but my second try was more successful and yielded a quite convincing scale paint brush handle.


Once you have reached the desired thickness, use folder piece of sandpaper or a cutting tool to thin the piece where you wish to separate it. I believe in lathe working this is called parting


Make lots more !


Give the handles some colour, here I have given them a watercolour wash to tint them without coating them (they will be sealed later)


I doubt I will be able to turn fine spindles on the dremel (even if I get a workstation to hold the dremel level and still) however I think with my cheap woodcarving tools I can imply greater detail with a few scored lines. After a few handles I tried the carving tools again and got a reasonable first magic wand which just needs to be stained, it can also be Belinda's first wand.

Model ship builders apparently use drawplates to create rails and pegs for their work, for woodwork the tool is used from the 'wrong' side of the die using successively smaller holes until the desired size is reached. I want to make some drawing pencils (and coloured ones like my real sets) and for this I feel I would need the reproducibility of a drawplate, using the same final hole for the whole set. Sat next to each other is will be very clear that they are not identical in width, there is a lot more room for variation in a jar of paintbrushes, I have about 10 different sizes, colours and styles in my brush pot (mug).

I need to work on creating the bristles for the brushes next, I tried some last night but it needs more work (the brush on the far left above has a little cyanoacrylate gel on it still, must sand that off.

Thursday, January 24, 2013

A Very Dangerous Visit

 
Last thursday I needed to work on a full scale project, cupcakes for my mum's birthday (I won't tell you how old) before spending the weekend at her house for a family dinner on sunday. This means I wasn't been able to work on my paintbrushes as I was without my dremel, but on the upside I was able to visit a recently open craft megastore near mum's house.


Thankfully there isn't a branch of this store near my house or I would be bankrupt! I did get to browse the place on my Christmas visit but I was itching to go back. Mum ended up going to another nearby store to buy a new toilet seat and then came back to drag me out. :(

I ended up buying two sheets of basswood (1/16th and 1/32  which is 1.6 and 0.8mm) I will be using these to make up a little wooden box for the paints to live in, hopefully it will have an authentic sliding lid.

Some one step antiquing crackle medium which caught my attention and a bottle of brown acrylic paint. I have the normal crackle medium but it takes a total of three coats to achieve the effect. The one step seems to be more of a crackly top coat into which I can rub some 'dirt' into the crackles in the form of a light wash or pastel powder.

Oh and a little craft punch, a 10mm circle. I don't have a reason for this yet, but I will find one.

Until next time,
Kim


What are your favourite tools and materials to use when making miniatures?

Thursday, January 17, 2013

Petit Paint Pans and Questioning my Sanity

Hope you are all keeping well

I sat down tuesday evening (in preparation for the livestream of the evening of awesome with Hank and John Green) with some crafting supplies to experiment.

I can't make a box for the watercolours until I see how big the pans will be, so that is the first thing to do. Full size pans are 30mm x 19mm x 10mm which seems fine until you start to divide by 12.

To give me a form to work around I cut a matchstick in half to give me the closest measurement I could get (Image 1 below). This was 1.35mm x 2.25mm when measured with a digital caliper which is quite possibly one of the most essential tools in my still limited experience. Mine are a cheap set from ebay, I'm sure they aren't 100% perfect but they are 1000 times better than me squinting with a ruler and guessing.


This is a few pans from my collection, two whole and one half pan. These got calipered (that is a word right?) which led to the decision that Belinda will be using whole pans, I'm crazy but not that crazy.


My technique was to wrap a 10mm strip of paper (thin, like tracing paper) around the thinned end of the matchstick like quilling, using white glue to form a slightly squashed tube. Remove from the matchstick and allow to dry. (2-5)

Take slices approx 1mm from this tube (chopping off any uneven ends) and squeeze into a rectangular shape. (6+7)

Take a little square of paper 5x5mm or so. Dip one end of the squared off slice (from the tube) into the white glue and press down onto the little paper scrap, allow to dry. Once dry the excess will be snipped off. (8&9)


Giving you pans which may not be quite 1/12th of my original pans but are freaking tiny and will leave your family questioning wether your medication dose needs increasing.

To fill, you could put in some polymer clay or a dab of acrylic paint. For accuracy however I took a scalpel and dug out a little pea of semi-solid paint and poked it in with a toothpick. If you have a brush small enough then you could make tiny little watercolour with this set.

I may try again and see if I can get a better result with polymer clay but I suspect the wall thickness may be an issue. Unless I make them all as one large block, experimenting will continue.

SO. This has been my first tutorial, let me know what you think and whether I should do more in the future. If so, what items would any self respecting witch have that I can experiment in making?


Thanks to all for visiting my fledgling mini-blog, please leave me some love below.
Kim


Two little notes.
1. Metric Measurements.....I am in the UK so whilst I am quite familiar with imperial measurement and will use them for quilting and baking, when it comes to dividing by twelve, and getting down to 32ths of an inch it only makes sense (to me) to use metric.

2. Photography. I like cameras, but until I have my new desk set up, all images will be on a light or dark background whichever is most appropriate (the black above is my planner). Also my digital camera is about 7 or 8 years old and just 3.2MP. It does good macro but so far I have been using my phone which has an 8MP camera (Samsung Galaxy S2). Later this year I hope to replace my olympus camera and will set up a little "studio" on my desk, a little foam core roombox with soft light from both sides which should improve my shots. My images are edited in GIMP, a free graphics program which I use to scale the images down and convert to jpg, this means photos with 1/10th the file size so my picasa allowance goes further.

Monday, January 14, 2013

Project One - A Home for Belinda the Witch

Good day all.

So I listed my preferred mini themes in an earlier post, but in the last few days whilst I have been resting up a back injury (moving the desk perhaps not a great idea) I have had Belinda the mini witch on my mind, and all over my pinterest account. Tudor cottages and dark furniture in 1:1 scale and some amazing magical scenes in 1:12 filled my mind. So this scene will be my first project back into minis.

I spent some time last night (couldn't sleep, back pain) sketching out some ideas for my witches house, a modular construction allowing me to display on a bookcase but put together as a complete house when I wish to show it off. More about that at a later date.

To begin with, I shall make lots of nice things to go inside what will be a temporary roombox. Meanwhile, I can work on rough cardboard prototypes of the actual house, allowing me to put a lot of hidden detail in each section before actually investing in the materials to build and dress the final house. Also, once most of the main furniture has been made, I can better determine the size needed to allow me to add decorative items for years to come without anything looking too empty. More on the design at a later date.

------------------------------------------------------------------------------------------------------------------

So now we come to Belinda, who is for the time being just an image in my head. An image mostly consisting of her character and very little of her appearance. Perhaps I shall sculpt her myself, perhaps she will come to me whilst at a show or from an artists shop. When I see her, I will recognise her. For now, think of Heidi Ott's Old Lady doll. She will likely wear a lot of black (and other dark colours), but have a worn kindly face, that of the local witch to whom everyone goes to for advice. She takes walks in the woods, communing with nature and spends hours in her garden tending to magical herbs and traditional vegetables.

I am sure that I will not be the first mini-ist to inject certain aspects of myself into my mini characters. One thing I like to do and that has entertained me whilst I was ill has been drawing and sketching, a little bit of journaling. Maybe a bit of zentangle. I think Belinda might share this interest also, and so the first thing I want to make for her is some art supplies.

  • Watercolour paint set in an old wooden box
  • Brushes and a water jar
  • Tubes of spare paints
  • Ceramic Palette
  • Art journal to sketch in
  • Completed work
It is late here now and I must go to bed, I have a busy day of errands and guides tomorrow so give me a day or two and we will see how the above plans go.

First, the little pans that hold the paint within the box.


Scale size should be......2.5mm x 1.5mm x 0.8mm ........this could be interesting!

Sunday, January 13, 2013

Pinterest, my internet drug of choice.

Hello. My name is Kim and I have a Pinterest Addiction.

I would ask if y'all were as addicted to pinning miniatures as I am but from the number of people out there pinning and repining I think that question answers itself.


With a total of 1364 pins over 35 boards (and a not too shabby 272 followers)  it would appear I have a terminal case of pinterest addiction. In fact, I am sure I spend so long on pinterest and other useful sites looking at other peoples work that I never actually get around to doing any of my own.

Whilst my physical spaces are rather cluttered it seems that my digital spaces are just about the same. I was thinking of dividing my mini board into smaller boards (such as shabby chic, techniques, witch-y, antique-y) but I have such a hard time classifying a single picture into just one category. What to do when the same item but in different colours/patterns would fit in very different scenes? I am terrible at picking favourites or making decisions so it will likely remain as it is indefinitely

In the mean time, you can find me and my most relevant boards here at

Just Me
Miniature Magnificence (minis I love, by other people)
Polymer Clay Tutorial (translates well into minis)
Miniatures - Full Size Inspiration (real size goodies I would never have in real life but in mini YES)
My Miniature Creations (Currently empty but not for long)

Do you have a mini related pin board? If so let me know so I can follow and adore.

(Image property of pinterest.com with whom I have no affiliation, just an addiction)

Thursday, January 10, 2013

Further Workspace update and the last of the cats.

Good evening all

So after a few more days of work on the desk area (it has been neglected for several years) the desk is now re-oriented but the top surface is still covered. A lot of other items in the house need to leave, move or be added before any real progress can be made and that will have to wait till finances allow. I will continue to work on the shelves above, on my bookcase and also upstairs and will return to the workspace with a guided tour when it is truly complete.My PC has gone but J's is "borrowing" some space from under my desk.


And to introduce the last of the bosses cats of the house, I bring you Loki. He is little younger than Freaya at around 7 and is also a rescue cat. He is also slightly evil. Not too much you understand, just the right amount of evil. The amount of evil that will steal the prawn right off the top of your ebi nigiri when given the chance. Also not the sharpest tool in the drawer. Madly in love with Freaya despite the fact she would gladly never see him again. Actually, if he left she would have no-one to give her daily beatings to. So instead he spends all of his time with Astrilde and are sometimes referred to as the opposite twins, black/white good/evil and yet such good friends.

My legs are under this cat

ALSO........this means I am going to start working on some actual miniatures, which will give me something relevant to blog about and hopefuly make some new mini friends.

Till next time, Kim.

Saturday, January 05, 2013

Workspace update

So here is an update after an estimated 8 hours or so of clearing work. A lot of stuff is still piled on the desk (because apparently the sofa is for sitting on) but you can see that there is in fact a desk, and a chair too! I wasn't imagining it!


Much paper junk has been bagged for recycling and also the above desk shelf is starting to improve. Some of that time was spent filing paperwork and bank statements from the past several years and shredding any other bits containing personal information, I also found my driving licence which I knew was in there somewhere.

The PC is still in place but perhaps tomorrow I will think about actually turning the desk (and cutting off excess length). There is a little set of plastic drawers under there now and they will be re-organised and put back along with two other plastic drawer sets from elsewhere in the house. At least until I can replace them with better quality metal drawers. The lamp is currently not functioning but we will have to see whether it can be salvaged, at least until I can replace it. The CD's will be sorted and either stored long term elsewhere or disposed of.

Crafting gear is going to be split into two main categories. TOOLS and MATERIALS

Tools are durable re-usable items used to manipulate the materials into finished items. Glue is in a fuzzy grey area. Larger amounts of materials will be upstairs (fabric collection) whilst smaller ones will be located depending upon frequency of likely need. Polymer clay will always be near at hand whilst that raffia I bought for mini nativities five years ago can live on a higher shelf. Also non-crafty stationary/office supplies will have a place to live for when I need envelopes and other such boring adult tasks.

Sunday the tree comes down so the dining table can migrate back to its proper place, that just leaves the rescue bookcase which will probably go where the other plastic drawers are coming from,at least temporarily.

And for anyone making it to the end of this post I give you Freaya. This is our eldest cat at about 9 years old, she is the dominant female of the house and rules with an iron paw.


Until another day, Kim

Thursday, January 03, 2013

The Workspace Make-over

Whilst I have been out of crafting condition my desk has become something of a dumping ground,  more like a bomb range after a visit from the Mythbusters crew than a creative space.

Also it was put there over a decade ago for university to house my desktop PC and its CRT screen. Now I am a laptop kinda girl, and in winter it is rare to find me too far from the fireplace where it is warm. That is another reason it is such a state.

All after shots need a before for comparison. So here it is, my desk area at its worst. (Note J's mostly tidy desk behind)


Now I am happy to admit that this is such a mess that you cannot actually see my desk, hence why I called it my desk area. what you have is a standard (melamine coated) chipboard desk, the PC tower has a cubby to the right of the monitor with a small drawer above and a wide leg at the other end. Between those two supports is a roll out keyboard shelf from the days when the monitor took up the whole desk. The desk stands at a right angle to the alcove so it projects kinda far into the room. The little space on the left has a mini bookcase in it that matches the desk. This shot also includes the folding dining table and a rescue bookcase which seem to have sucked in by the gravitational force of that much junk.

More pictures of my shame


The plan is...... get ALL the stuff out. PC will be stored upstairs in the event of a laptop failure, that will free up a lot of space. The dining table will bo back to its intended location once freed up, it currently houses the christmas tree. Bookcase.......to be decided.

The new desk will consist of.....
  •  The existing desktop, cut to fit inthe alcove (parallel, not at a right angle) held on four 2x4 legs with stabilizing cross pieces, most of this can and will be cut from scraps of the current desk.
 Beneath this...
  •  3 sets of metal office drawers on casters courtesy of Ikea (when finances allow, inferior plastic ones I already have until then.
  • At the back of the desktop surface, small diy drawers for my most frequently used small items.
  • Pots of pens/paintbrushes will sit on top of there with any items that are drying or being photographed
Please excuse the plan sketch being photographed, the scanner refuses to scan because it has no cyan ink. (!?!?!?!?!?) Also it was drawn on the back of an activity sheet in McDonalds this afternoon.

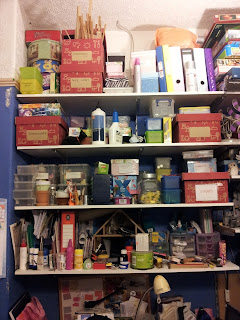
The shelving above will be reconfigured to house items one deep so that no box is behind or below another, this will likely bring the shelves closer together and extra shelves (not as deep) will be added at the bottom (not as deep so I don't knock myself out on them.)

Lighting will consist of 2 anglepoise type lights which can be used together to give shadowless (almost) light for photography.

Let the sorting begin......Until next time.


Hello and Welcome

Astrilde by thequiltedcat


Good evening from rainy England.

My Name is Kim and I have long been fascinated by miniatures, how such dainty versions of ordinary objects take on an almost magical cuteness. In case anyone is wondering, I turned 30 last year.

I have made miniatures before a few years ago and enjoyed swapping with other UK based mini-ists, however ill health meant I left the group to concentrate on getting better. Several years and two major surgeries later I am back in fighting form and wanting to get back to my love of miniatures, so as part of my 2013 goals is to make minis once more. Even at my sickest I never stopped reading mini-blogs and later pinning images that inspired me, and to help me get back into the fold I am starting this blog for interaction with other people who share my interests.

Living in a small house space is in short supply, another reason that minis are a great hobby, room boxes need never take up that much space. And materials tend to go quite a long way when you make tiny things. I did start a scratch built house with basement all those years ago but I discovered that I didn't want to do whole period houses, furnished with low end purchased pieces. I have no interest in doing a mini bathroom.

I would rather concentrate my efforts on a few various room boxes in a mix of styles/themes and make as much as possible myself,swap with others and buy only metal and glass items which I can not work with. I want to concentrate on learning new techniques to create ageing and wear and on making really high quality pieces which I can then swap with some of the bloggers whose work I adore and broaden my collection. Techniques such as mold-making and casting are also fascinating and I can't wait to try them. Some day I hope to buy a kiln and learn to work with fired ceramics and glass (lamp work), but that will have to wait till I get my financial footing back and a more dedicated workspace.

My room boxes will be - in no particular order and often simultaneously
  • A witches house, her name will be Belinda. Or at least the working part of the house, again, a witches bathroom doesn't interest me, or her kitchen. I want to see all her books and jars of potion ingredients, cauldron and black cat.
  • A shabby chic teashop/bakery with a gift shop This will eventually be two boxes one above the other but will inhabit one box until it expands.
  • Some kind of antiquarians office/library full of books and artifacts, no specific period and will be filled with various curiosities. Everything from artifacts from fantasy realms such as Tolkien (OH is a big fan) through to a miniature versions of the mars curiosity rover.

Of course this being the first ever post on the blog only a few early and/or very dedicated readers will ever see it, once I have some actual posts for people to see then I will start being more public about it.

So that dear readers is quite the treatise.

Step 1 will be workspace, turning my former computer desk (I always use my laptop on the sofa now) into a working area, and as funds allow, adding storage drawers below (hello IKEA) and boxes on shelves above for my most used tools and materials. Large fabric yardage and rarely used items will have a shelf upstairs.

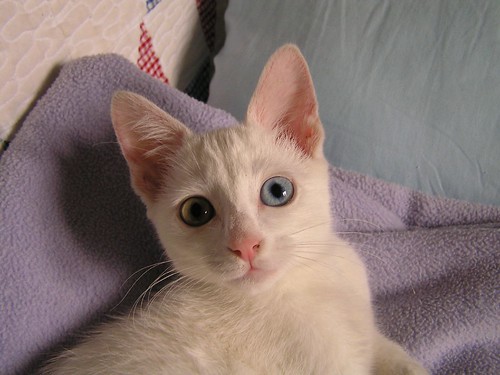
And in case you were wondering about the kitten at the top? I hate blog posts without pictures and since I had nothing relevant I played it safe with our youngest cat as a kitten. Her name is Astrilde and she is now 6. She is the sweetest bundle of love you will ever meet. You will meet the others in later posts.

Till next time
Kim